The project’s aim is to define rules to restrict access to SOS contents on the operation and parameter level. An introduction to the project can be found in the previous blog post. This goal is achieved with a nice graphical user interface to enable the admin user to manage permissions for a particular enforcement point, which is the connection point for the client instead of the original SOS endpoint.
During the first half of the term, I kept in touch with my mentors regarding the design and implementation via a conference call twice a week. My weekly reports track the status of the work done up to the mid-term. The tasks were to decide on the various user stories and to implement as many of them as possible. I created a wire frame for each user story and, after finalizing the design, implemented the user story. The major user stories, which have been completely implemented to date are shown below.
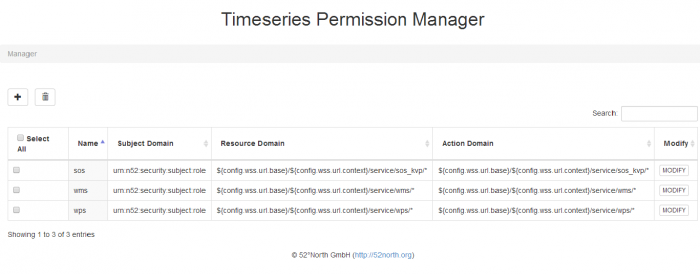
Listing the various Permission Sets
Figure 1. The main page of the app lists the the admin‘s various permission sets. The admin can perform various actions from this page, such as deleting multiple permission sets simultaneously, modifying and/or adding permission sets.
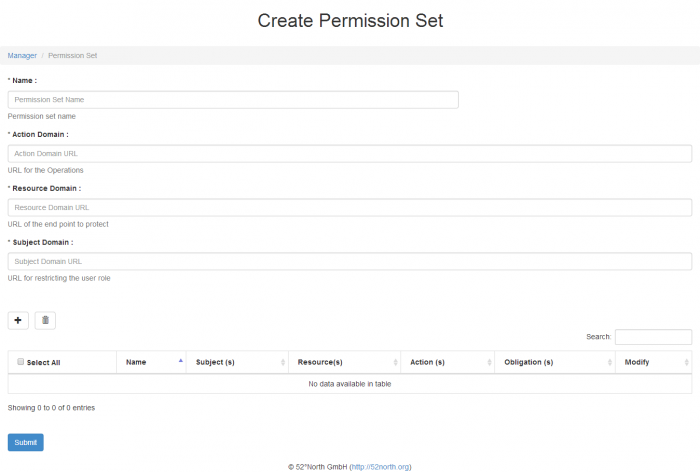
Creating new Permission Set
Figure 2. The user can create new permission sets. Since every permission set consists of sub-permissions, the UI allows the user to create new sub-permissions, as well as modify and delete the existing ones.
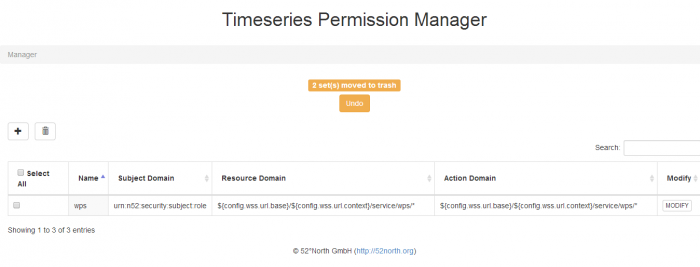
Deleting Permission Set(s)
Figure 3. The user can delete multiple permission sets simultaneously by selecting them and clicking the “delete” button. The delete action can always be undone within 10 seconds. If the user tries to refresh the page a warning appears that items are selected for deletion.
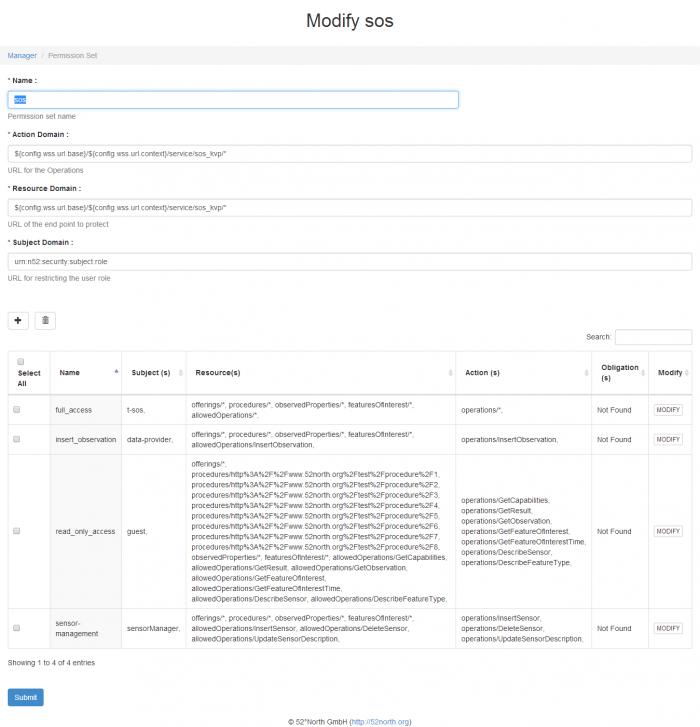
Modify Permission Set
Figure 4. Each permission set can be modified after clicking the “modify” button in the permission management page. The user can change the permission set name and other fields, modify or delete existing sub-permissions, or add new sub-permissions.
Creating new sub-permissions
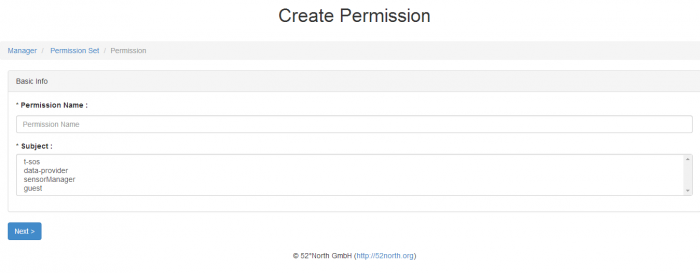
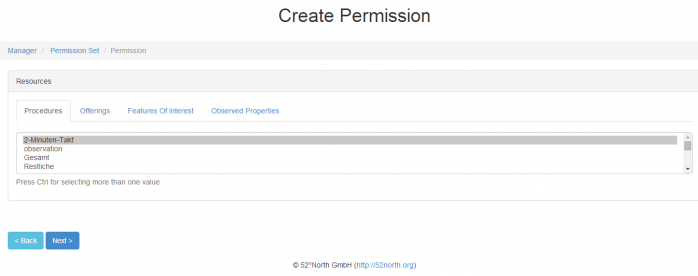
Figure 5. The user can create new sub-permissions for a permission set by clicking the “+” button on the permission set page. The sub-permission screen is a wizard, which is currently divided into 3 steps: 1. Basic Information , 2. Resources, 3. Actions.
Basic Information requires user roles, which are obtained from the user database. The parameters for different resource types are retrieved from the Timeseries API. A user can select multiple parameters from the dropdown menu for each resource type. The application currently uses the following resource types: procedures, phenomenon, features of interest and offerings.
Demo
Within the next few days, the demo server will provide an up and running instance of the user stories mentioned above.
Architecture

Figure 6. Describes the architecture of the application from a use case point of view
Further Tasks
In the second half of the Google Summer of Code project, we plan to implement the following major features:
- The current setting of adding actions to a sub-permission is not yet well designed and user friendly, but the basic setting works. A major task will be to design the user interface in such a way that the admin can specify the operations such as InsertSensor, DeleteSensor etc. in an easy and simple way.
- While modifying an existing permission set, the admin user can save the modified permission set as a new permission set with the help of “save as new” option. This will simplify adding new permissions based on existing templates.
- Good explanations or examples of the sub-permissions will be displayed to the user, so that he can directly see what impact his selections will have.
Stay tuned for more!
Leave a Reply